
it's quiet in my studio for the next couple of weeks. so I'll be enjoying a little vacation with my family. I hope you'll do the same!

 green and brown with orange medallions
 orange tweed and green floral
 dotty pocket with orange plaid floral
 It started out as a fleece hoodie and a few felted wool sweaters...

 So this is what Fyn and his papa have been doing lately...


 Somehow I couldn't manage to spend over $10 on this handy little set of strap wraps, so I made my own in about five minutes with some leftover towelling and velcro. Serge the edges, sew on the velcro and attach to car seat or stroller straps so they don't chafe your baby on the neck! They are washable and absorbent!

 While browsing on etsy one day, I found these sweet recycled pin cushions. Turns out they are made by a creative mama, who has some creative kids as well. You'll want to check out all their shops!
 This is one of the most incredible dolls I have found in all my searching. Her hair is so styley and the outfit! Love the matching ladybug backpack. and the incredible packaging! I love that I can see parts of recycled sweaters in the mix too. Part of me really wants to be young again so I can put this on my christmas list.
 Here's the one I would choose for my little guy! All his dolls seem to be girls, even the waldorf babies...
 I fell in love with these little faces in less than three seconds. Then I read the story. It was totally enchanting. And they are recycled from trees. Nature, recycling and gnomes, three things that I love!
 This tiny little gnome comes in his own recycled paper home. Only a child could create such amazing, wonderful sweetness.


 For those of you who love a giveaway, here's a great one! (contest ends 12/15, so get on it!) The ergo carrier has quickly become my husband's favorite baby carrier, and mine too. Thanks to my blogging friends for the heads up!
 You are right at the crucial moment when all the pins are removed and you are sewing things together, when you realize that you've been sewing for about 12" without thread!


 Finally, there was time in the day to make something for myself, something warm, creative, practical and luxurious. The sleeves weren't long enough, so I did some experimentation. The designs worked out well, but I think next time I would open up the sleeve and overlap the pieces, stitching with a straight stretch stitch so they would lie flatter.
 Inspired by my friend, Rose, I took out my scissors and made it happen! For the ribbing, I just used pieces from the neck and bottom of other sweaters, folded it in half and serged it right on! When I make the next one, I'll make the pieces a little wider up by the shoulders, so I can wear a shirt underneath without it showing.
 The front pieces overlap so there is nursing access!


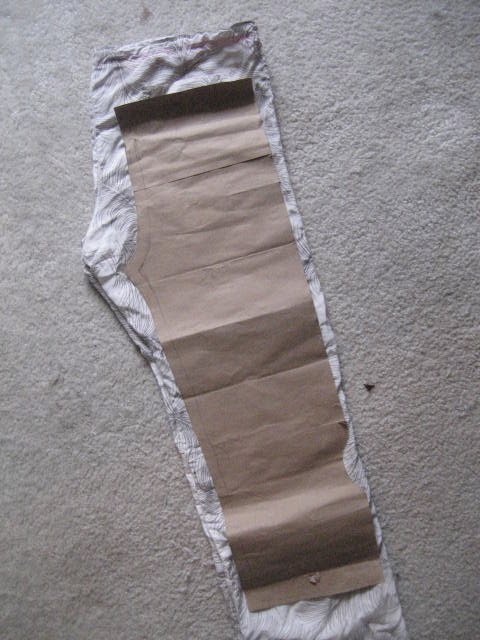 Cut out the pattern the fold of the pants. You can use the bottom hem if your pattern fits.
 Unfold the pieces and lay them with right sides together. Stitch the inseam.
 Now line up the center seams and stitch up the legs.
 Fold under about 1/2", and then about 1 1/2", press and stitching, leaving open a few inches to insert elastic.
 Cut a piece of 1" elastic that is about 3/4 the size of the waist, or maybe a little less. If you are lucky enough to have your subject handy, you can "try it on" first and then add a little for overlapping.
 It's a good idea to make sure that the elastic is flat all the way through, and not twisted.
 If you can try them on, now's the time, to see if you need to change the elastic. Otherwise, just stitch the opening closed and voila!


